

Homemade Watermelon wine is tasty, easy to make and a unique choice for summer imbibing. Making it requires only fairly basic ingredients.
Originally published August 3, 2011, Updated on 11/4/20

What can I say, the tornado screwed with our summer brewing schedule when it turned our lives upside down!”
Blogs sure can be a weird look back on one’s own past!
Anyway, since posting this recipe, this post has gone on to be one of the most popular on our blog! Being so old, though, there’s definitely room for updating it and adding more info.
So, here we go!

Watermelon Wine
This wine is easy to make, requiring very little in the way of ingredients... but does require some time.
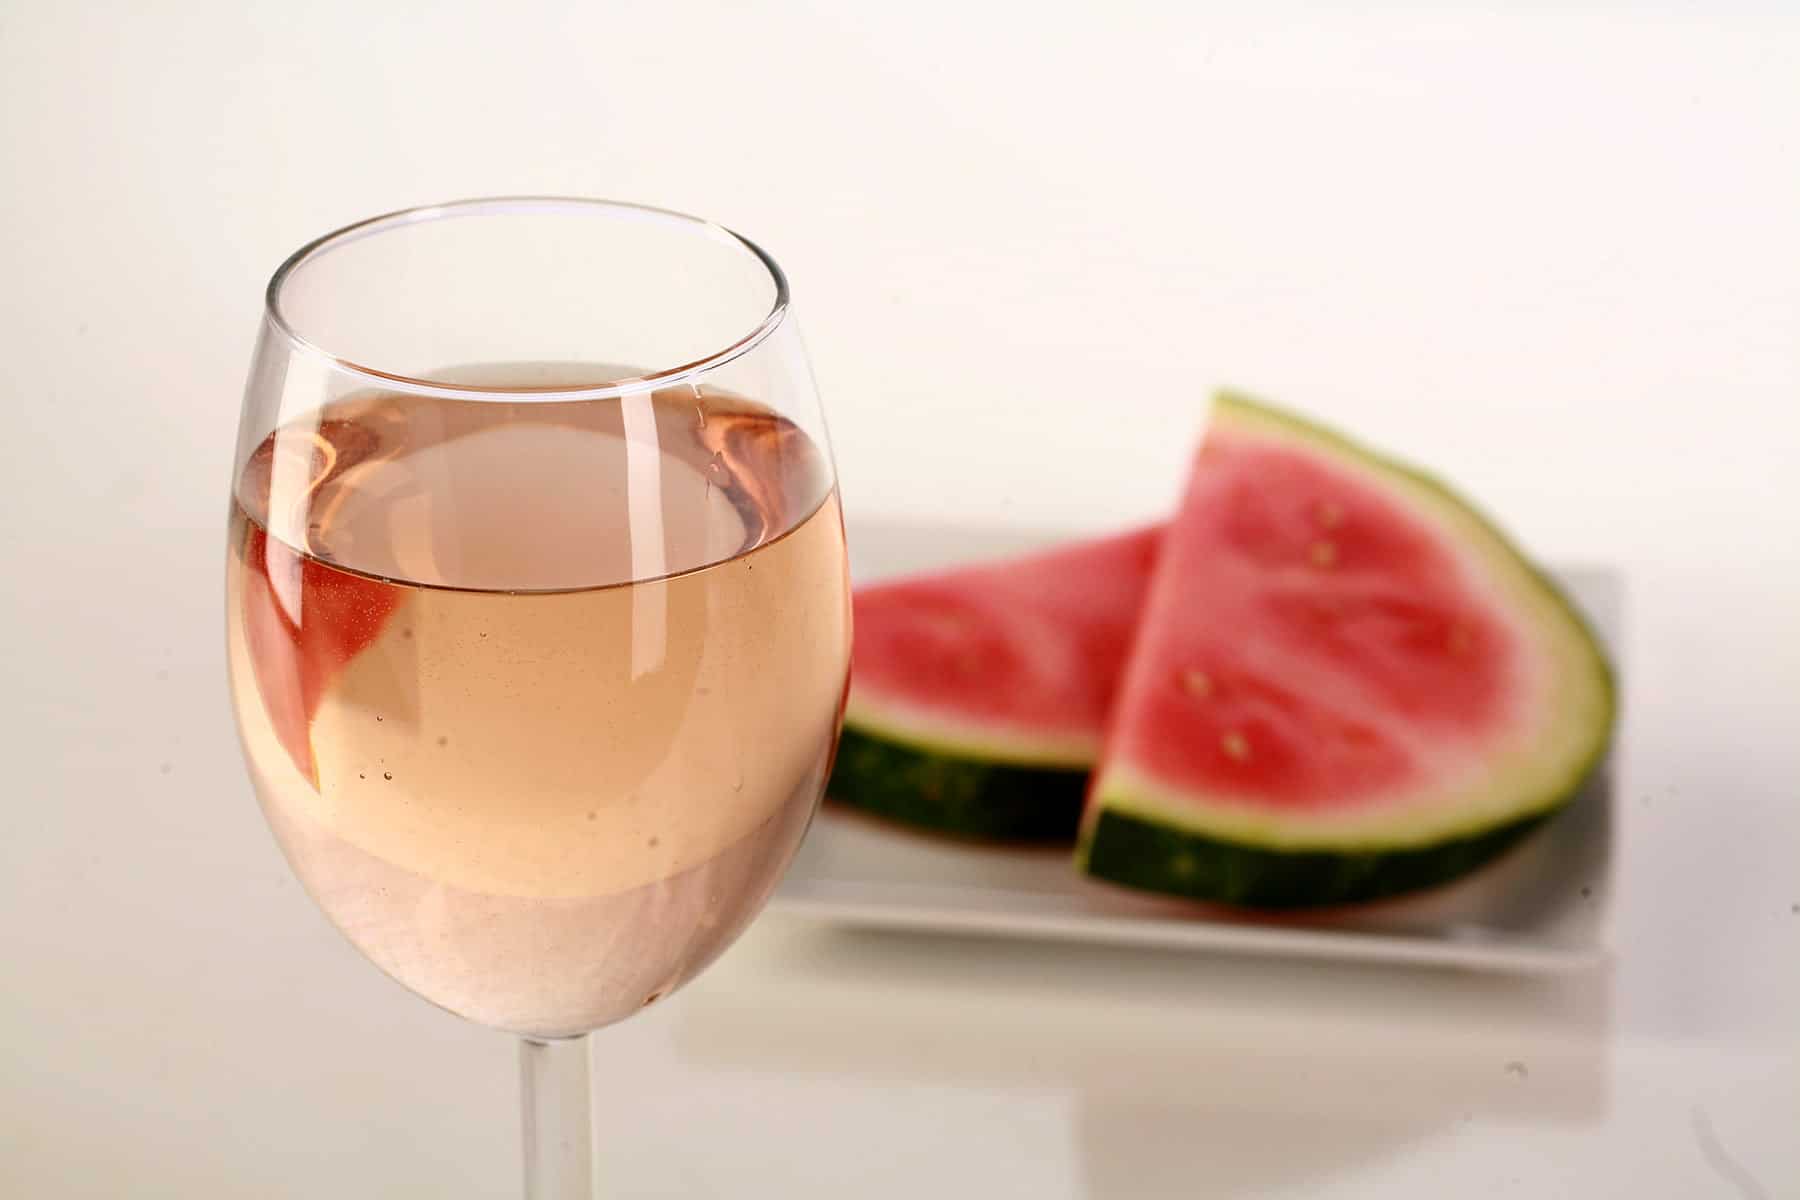
Once you wait it out, you’ll be rewarded with a beautiful, fruity wine that tastes like *summer*. It can vary in colour from a pale straw colour, to a pretty, pale pink... it just depends on the variety of watermelon.

Wine made from yellow watermelons, after bottling. Wine made from Red watermelon loses a lot of the colour, but will end up slightly more pink than this
It’s kind of fun in that you never really know what you’re going to end up with, for colour - some start out red and lose all colour - going almost yellow - and some start out pink and stay basically the same colour til the end!
It's lovely when served chilled on a hot summer day... just be careful, it will knock you on your butt if you're not careful. The sweetness hides its potency!
Wine Making Basics
If you haven't attempted making wine before, don't be intimidated! Check out our primer to home brewing:
- Wine Making At Home, Part 1: Why?
- Wine Making at Home, Part 2: Equipment to Get Started
- Wine Making at Home, Part 3: The Brewing Process.
- Wine Making at Home, Part 4: How to Stabilize and Back Sweeten Wine
Just a small handful of entries, and you'll be good to go!

Watermelon Wine Ingredients
This recipe uses few ingredients, but it's important to make them the right ones. Most importantly:
Watermelon
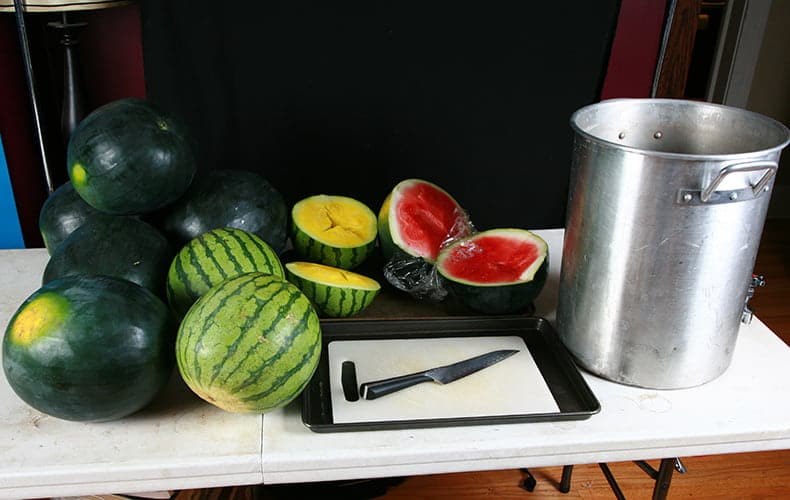
First things first: You want to use fresh, ripe, juicy watermelon.
We used to recommend using only watermelons WITH seeds, but seedless watermelons have been as good - and sometimes better - in flavour than seeded watermelons lately, so we’re relaxing that stance.
I’d recommend tasting your watermelon as you cut it. If it is “meh” on flavour now, it’ll likely be kind of “meh” on flavour once fermented.
It’s always easiest to start out with flavour, rather than try to add it after the fact. Find watermelons that have a great, robust flavour, and you’ll be glad you did!
Sugar
While we tend to play fast and loose with the sugar choices at times, watermelon wine has a much more narrow range of sugars that work with it:
Granulated Sugar
Plain white granulated sugar is your best bet for Homemade Watermelon Wine, and it’s what we use every time, now.
It provides the most neutral flavour of all the sweeteners, which is important when the fruit being used - like watermelon - is a more subtle and easily overpowered flavour.
Honey
While we recommend exclusively using white sugar for the best results, you CAN substitute honey for all or part of the sugar.
Note: If you substitute honey for all of the sugar, you’re making a mead. More specifically, a “Melomel” - a mead made with fruit. File that one away for future trivia contests!
If you do decide to use honey with this one, use one that is lightly coloured and flavoured. Any of the darker honey varieties - such as buckwheat - or heavily flavoured ones (like wildflower) will overpower the watermelon flavour.
You may end up with something tasty, but it won’t be watermelon flavoured!
Yeast
We like to use Red Star’s “Champagne” Yeast for this one. It has a high tolerance for alcohol, which allows for a high final ABV.
You can use whatever wine making yeast you like, just know how it’ll impact your final product.
The main way that your yeast choice will impact the final product is in ABV. The higher a yeast strain’s tolerance for alcohol is, the longer they’ll live as they’re fermenting your watermelon juice - and the higher the ABV you’ll end up with.
The more sugar the yeast processes into alcohol, the dryer the wine gets, as well.

Yeast brands and strains can vary wildly depending on your store and where you live, so I definitely recommend talking to your local homebrew supply store. Let them know what you’re aiming for in terms of sweetness and/or ABV, and ask which of their yeasts they’d recommend.
Just don’t use bread or all purpose yeast for brewing, though. Stick to wine yeast!
Back Sweetening Your Watermelon Wine
Watermelon wine is a wine that is best made sweet. Dry watermelon wine... doesn’t really taste like much of anything. Like most fruit wines - especially the lighter coloured ones - you’ll definitely want to make this one at LEAST semi sweet.
Sometimes, you’ll find that the yeast went a bit too far with their smorgasbord, and you end up with a wine that’s not as sweet as you’d like it.
... and that’s when you back sweeten it! You can read my How to Stabilize and Back Sweeten Wine post for information on how to back sweeten it.

Watermelon Wine Specifics
While the earlier mentioned “Wine Making Basics” posts have a ton of great information, there are a few things specific to Homemade Watermelon Wine that aren’t addressed:
Preparing your Watermelon
Chopping the watermelon is messy business. I recommend putting a cutting board in a baking sheet (the kind with rim/short walls), and cutting it up in there. Periodically dump the accumulated juice into the pot.
Seasonality
This is very much a seasonal wine, and it will NOT turn out anywhere near as good if you make it with winter produce.
Additionally - unlike most of our wine recipes - there really isn’t a frozen version of fresh watermelon!
With those bits of info in mind, be more wine than you think you’ll need, because you’re not going to want to start another batch in 6 months or whatever!
We made the mistake of only putting on 1 gallon the first time, and 5 next time. This year, we'll likely make 10 gallons - plan accordingly!
Watermelon wine makes a great gift... especially after a tornado, LOL. We had a TON of people to thank!
Water
One question that we’re asked often is “But how much water do we add?”
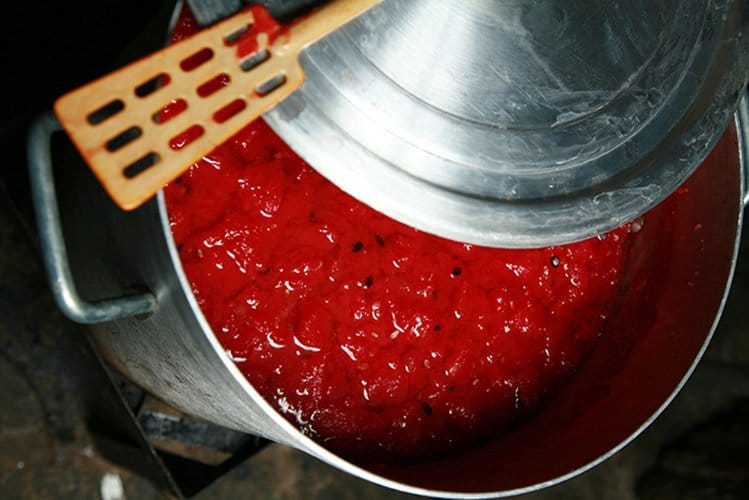
It’s no mistake that we don’t call for water in the recipe - we don’t USE water for this. Unlike most fruit, watermelon breaks down almost completely when heated.
You start out with chunks of watermelon - and the juice that comes out as you cut it - but it quickly breaks down to a liquid.
Because the watermelon flavour is relatively subtle compared to most fruits, we don’t add any water at all, and just ferment straight watermelon flesh / juice.
More Home Brewing Recipes!
While you've got your current homebrew fermenting away, why not consider putting a batch of something else on, to occupy your wait time? Here are a few of my other wine, cider, and mead recipes:
Wine Recipes
Banana Wine Recipe
Blackberry Wine Recipe
Blackcurrant Wine Recipe
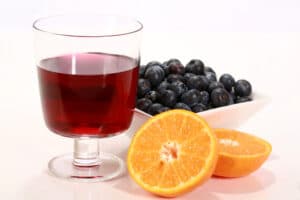
Blueberry Wine Recipe
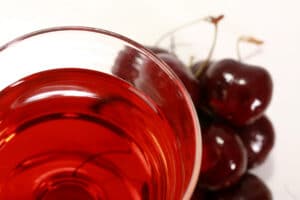
Cherry Wine Recipe
Cranberry Clementine Christmas Wine Recipe
Cranberry Wine Recipe
Faux Lingonberry Wine
Lychee Wine Recipe
Mango Strawberry Wine Recipe
Mango Wine Recipe
Mint Wine Recipe
Lychee Wine Recipe
Partridgeberry Wine Recipe
Passionfruit Wine Recipe
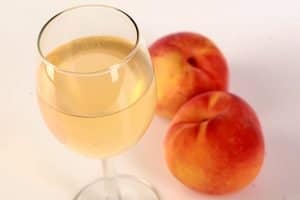
Peach Wine Recipe
Stone Fruit Wine Recipe
Strawberry Wine Recipe
Ube Wine Recipe
Mead Recipes
Black Cherry Mead Recipe
Blueberry-Clementine Mead Recipe
Blueberry Mead Recipe
Clementine Mead Recipe
Pumpkin Mead Recipe
Wildflower Mead Recipe
Cider & Miscellaneous Homebrew Recipes
Hard Apple Cider Recipe
Home Brew Hard Iced Tea Recipe
Maple Hard Apple Cider Recipe

Share the Love!
As you’re brewing - or serving! - your homemade wine, be sure to take some pics of your handiwork! If you post it to Bluesky, be sure to tag us - @CelebrationGen. We're also on Pinterest, so you can save all your favourite recipes to a board!
Also, be sure to subscribe to my free monthly email newsletter, so you never miss out on any of my nonsense.
Well, the published nonsense, anyway!
Anyway, on to my Homemade Watermelon Wine Recipe!
How to Make Watermelon Wine
Equipment
- 2 gallon fermenter bucket and lid
- 1 - 2 1 gallon glass carboys & stoppers
- Siphon, siphon tubing.
- 1 air lock and stopper
Ingredients
- 1 Large, Ripe Watermelon
- 3 lbs Granulated Sugar
- 1 teaspoon Acid Blend
- 1 teaspoon Yeast Nutrient
- 1 packet Red Star “Champagne” Brewing/Wine Yeast
Instructions
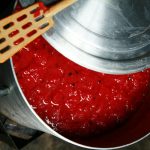
- Slice up watermelon, discarding rind. Chop watermelon flesh into 1″ cubes, placing into a large pot. Once all watermelon flesh and juice is collected in the pot, heat over medium, stirring and mashing frequently, until watermelon flesh has broken down into liquid. Remove from heat.
- Measure about 3.5 L / 14-15 cups / 120 oz of juice, reserve any remaining – you can drink it straight, or make cocktails from it! In large pot, combine measured watermelon juice (straining the seeds out as you measure!) with the sugar. Heat to almost boiling, stirring until sugar is dissolved. Remove from heat, cover with sanitized pot lid.
- Once mixture has cooled to room temperature, add acid blend and yeast nutrient.
- Using a sanitized funnel, transfer cooled mixture to a sanitized 2 gallon fermenting bucket.
- Using sanitized equipment, take a gravity reading. It should be in around the 1.16 area. Keep track of the number! (This is an optional step, but will allow you to calculate your final ABV %)
- Sprinkle yeast into bucket, cover with sanitized air lock. Let sit, undisturbed, overnight.
- Within 24 hours, you should notice fermentation activity – bubbles in the airlock, carbonation and /or swirling in the wine must. This means you’re good to go! Put the bucket somewhere cool (not cold!), and leave it alone for a month.
- Using sanitized equipment, rack the clarified wine off the sediment, into a clean, freshly sanitized 1 gallon carboy. Cap with sanitized airlock, leave it alone for another 2-3 months. r
- Repeat racking process. Leave wine alone for a month or two. By 6 months in, your wine should be very clear, and VERY tasty!
- When your wine has been racked a few times and shows NO more fermenting activity for a month or so (no bubbles in the airlock, no more sediment being produced, you can move on to bottling:
- Using sanitized equipment, take a gravity reading*, then rack the wine into clean, sanitized bottles. Cork.
- Enjoy.. and start planning for next year’s batch(es)!


DA Bessire
When you make a 6 gallon batch do you multiply even the yeast and acid blend by 6 ? Let me know.
Marie Porter
Multiply the acid blend, but you don't need to multiply the yeast. You can toss a second packet in for good measure, but I wouldn't bother with any more beyond that.
Chemusto Tom
How much water is added to the watermelon juice e.g 3.5 letres of juice
Marie Porter
None - per the recipe 🙂
Julie
My wine stoper bubbling after a week. What should I do?:(
Julie
Marie Porter
Just leave it until you rack it over. If you had bubbling for a week, your yeast was fine!
Jenna
Is there any point that I should add a Campden Tablet?
Marie Porter
We don't use campden tablets, that's why we heat it - serves the same purpose.
Tabitha
I have a 6 gallon kit but I don't want to make that much. Can I still use the 6 gallon vessel and just not fill it?
Marie Porter
Depends on how much you're looking to make.
5 gallons shouldn't be a problem, but the more air space you end up with, the higher the risk of something going wrong.
Tom Johnson
I notice you didn't use a Campden tablet (1/gal) to kill off local yeast prior to pitching the wine yeast. This is different than other fruit wines I make. Is the Campden tablet treatment not needed?
Marie Porter
Only when you're not cooking the fruit.
kemp larson
How much water do you add? I fo not see it.
Michael Porter
None, you break the watermelon down into juice by heating it.
Kellie Delong
I love making different kinds of wine and watching the look on somebody's face when they drink it
Carmen
This is my second adventure in wine making. My first, blackberry wine, was successful and very good.
I followed the directions but I am not getting any bubbles at w4 hours. Any idea where I went wrong?
Marie Porter
Your yeast may have been old/dead, you might have added it before it cooled down enough (and killed the yeast)... hard to say without being there while it was made.
DA Bessire
Ok great I'm all in for a six gallon batch. Do you use anything to kill the Yeast? Any other Chemical additives? Thanks for taking the time to write this guide and answer our questions..
Marie Porter
Nope, we tend to figure that by the time the watermelon has broken down, it's been heated enough to kill any remaining yeast.
DA Bessire
When I heated the melon it never turned into a liguid completely. I could strain but along with the seeds I am getting a lot of flesh containing lots of sweet. Could I leave the seeds and all? Do you think I am doing something wrong, maybe not stewing it long enough?
WES UNWIN
Last week was 3 months bottling.
Wine is pale and very tasty. Finished at 12%AVB.
Thank you for the receipt
Now watching for 6 months adversary. Don't think it will last for 1 year.
nickie
do you have issues with the yeast bubbling out of our airlock when it is just put on top? I did exactly as your recipe states and I kept having the yeast foam out the airlock so I had to stir it in. Thanks for your reply!
giles blkackwell
what if you use rind and melon flesh would the wine taste awful ?
Kat
Peel the green skin from the flesh and make watermelon rind pickle! Everyone loves it !!!
Ron Heilmann
Can I use a 5 gal plastic water jug as a carboy or does it have to be glass?
Marie Porter
Ideally glass - plastic can impart weird flavours on your wine, if you keep it on plastic too long.
Jimi
It says add yeast nutrient in step 3 and then add yeast in step 6 is there two things of yeast I need?
Marie Porter
Yeast nutrient isn't yeast. It's yeast nutrient!
Laverne
Hello, I made a batch, it’s been racked once now. Tasted kinda like a bland couph syrup at this point. What else can I add to perk up the flavor a bit? Mint? Kiwi?
Marie Porter
Might want to add a little acid blend to perk it up, but honestly I'd just wait. What wine tastes like once it's finished is nothing like what it tastes like at the first racking, IMHO.
Kyle Prunty
Yeast and Yeast Nutrient are two different things. Yeast is alive and feeds on sugars, creating alcohol in the process. Yeast nutrient is meant to keep the yeast healthy. Think of yeast as a person, sugar as a steak, and yeast nutrients as the vegetables. The "vegetables" help the yeast live longer and produce higher ABV.
Ciry
I thought I was going to have enough watermelon juice for two gallons so I put in enough sugar for two. I only ended up with 1.5 gallons. My wine is three months along now and I tasted my last ABV test sample ( 12,6) and it was very sweet. Is there anything I can do to make the wine less sweet?
Marie Porter
If you don't care about timeline, I'd say juice some more watermelon, simmer it long enough to sterilize it, then add it to the fermenter, along with a bit more yeast and yeast nutrient.
Ciry
Thank you I’ll try that
Brad
My watermelon wine has the funky rotten watermelon smell after fermentation. Have you experienced this? Does it go away with time?
Marie Porter
I have not - were you SUPER careful not to allow bacteria in at every step? I'd assume contamination with a smell like that.
jonny
how big of a difference will it make if you don't use that yeast and what is an acid blend (vinegar)
Marie Porter
Using any of the winemaking yeasts will work, it'll just affect the final alcohol content, more than anything. Some yeasts have a higher tolerance, will take the wine much drier. If that's the case, you'll want to add more sugar after fermenting - watermelon wine really does need to be a sweet wine.
Acid blend is a common additive, found at homebrewing supply stores. Don't use vinegar!
Julie Pelton
Is the yeast used in here the red star premier blanc champagne yeast? I Want to make sure I get the right one. And also wondering how sweet this wine ends up. I like mine pretty sweet. Thanks!
Marie Porter
We tend to vary which yeast we use across different batches, Premier blanc works though.
How sweet it turns out is up to you - you definitely want to backsweeten this one, though. Without some residual sugar, it doesn't taste at all like watermelon.
Maureen
Marie, my husband and I bottled our first gallon of watermelon wine yesterday, using your recipe, and it is beautiful and very good! You are correct about the high alcohol content...I think ours ended up being between 16 and 17 percent!! We look forward to Summer and growing more watermelons and making more wine. Thank you so much for your delicious recipe!
Marie Porter
Thank you for your kind words!
How amazing that you can make it with your own home grown watermelons! Consider me jealous.
Sharon Ramon
What can I use for a fermenting container if I dont have a locking lid. Could I use an instantpot container. Completely new to this...obviously.
Marie Porter
You're really going to want a proper fermenting container that can take an airlock. They're really cheap though - a good investment!
prit
Hello Marie,
Me from India and it is the water melon season. And I intend to make water melon wine from your recipe.
However, some difficulties and some questions.
1) We don't get acid blend here. So, I intend to mix lime juice and tamarind juice (citric and tartaric acid). Because a blend is also citric and tartaric acid. Do you think it should work well?
2) Can I turn the water melon into a fine juice using a juicer instead of crushing?
3) Also, in your recipe you have asked to strain out the seeds. But I wonder how is that possible. Once you strain, are you also not going to strain out the reminder of the flesh which hasn't been converted into juice?
4) No need to add any water to this, right?
5) Should I boil? Instead can't I use potassium metabisulphite (we don't get campden tablets here in India) and leave it for 24 hours before adding the yeast.
And last question:
6) when I add yeast, will it get dissolved automatically or is there a need to stir it?
I appreciate your patient replies Marie.
Thank you.
Marie Porter
Hi Prit!
1. OK... do you have a brewing supply store near you? Personally, I'd ask them what's used for acid in brewing over there, if you can't get actual acid blend. I have no idea if tamarind and lime are acid enough to be a stand in, or what the ratio would be.
2. You can, but that's definitely more work / mess.
3. You'll get a bit of flesh with it, but most will have liquified.
4. Nope. No water.
5. You can use that, but I prefer to boil.
6. Just add it, it doesn't need to be stirred
Willie Gutierrez
Leaving it on the sediment before the first racking for a month or two doesn't cause off flavors? Ill fallow the recipe exactly but thought ide ask the question. I usually tack for the first time after two weeks, just because thats how i learned. Ive never made watermelon wine before.
Thanks.
Marie Porter
We've never had any off flavours from it
Joe
Marie, this looks like a great recipe! One that I am looking forward to trying once watermelons are in season. I have a question though, after you mash the watermelon and measure out the liquid; do you strain it or include the watermelon flesh as well?
Marie Porter
The watermelon flesh basically liquifies as you cook it, so I leave it all in.
John Snider
I didn't find your recipe until a month after I started my 5 gallon batch. My local home brew store was out of the champagne yeast so my wife picked up some turbo yeast. The turbo yeast was intended for using 13 lbs sugar and 5 gallons of water to make a 26% alc mash. I assume to further distill. The mixture started working within 2 minutes of placing the airlock on. I will let you know how it comes out when it's finished. I will be using you're recipe next year. Thank You.
Marie Porter
No problem!
I've never used turbo yeast, so I'm curious to hear about how it turns out!
Brad
Hello ma'am,
I live and work on a fully operational farm in south GA. I've made watermelon wine a few different times using a very similar recipe. I've always only made 5 gallons at a time, just for personal consumption. The owner of the farm I work on found out about my wine through word of mouth. Needless to say, he was a fan and wants me to make 100 gallons this year and will fully fund the operation. My question is, in your professional opinion, how much yeast should I use total? I have asked my elders that was generous enough to teach me to make it originally, yet that was almost a year ago and no one seems to have a straight answer for me. I sure would greatly appreciate any and all advice and insight you May have on this.
Thank you for your time,
Brad
Marie Porter
Well, I have NO experience at all with commercial, large batch wines, so I'm really not the person to ask. If I were to guess, it'd be a packet per 5 gallons... but for all I know, commercial wineries use yeast in larger packets.
Paul
How did John snyders wine come out? I think the turbo yeast will give it some off flavoring because it's mostly used for higher alcohol content mash for distilling.
John Rhoe
Some commenters have no brewer’s sense. But, I worked in wine research. I have a leg up.
jean
is lalvin all purpose wine yeast ok to use instead of the red star... i am very new to this wine making... and after reading this watermelon recipe i have to try it... so any extra tips would be great... going to try for making a 5- 6 gal batch. thanks
Marie Porter
Should be fine!
Chris
I want to make 5 gallons for a party im having I was wondering would i multiply the ingrediently for 1 gallon by 5 or is that to much sugar and yeast just w/o dering new to wine making ive made small batchs never this big
Marie Porter
You can just multiply by 5 for everything but yeast. You CAN multiply yeast by 5, but you really don't need to. I'll usually just double the yeast for a big batch.
chris
quick question. making a 5 gallon batch in fermentation buckets, do I multiply everything except the yeast by 5?
Marie Porter
More or less, yes!
Donna
If using champagne yeast does this have to be bottled like champagne?
Marie Porter
Nope
Fred
how long can I store the wine.
Marie Porter
We've stored it for a couple years. Not sure beyond that, it's always gone before it can get too old.
Bull
Would a steamer juicer work? I have had good luck with strawberry and blueberry just curious
Marie Porter
I'm not even sure what that is, so can't really give any advice there.. sorry about that!
Timothy Nichols
To give you an idea of how much liquid you will end up with. I would say that I extracted at least 95% of the watermelons juice. I had six watermelons that I recently worked up to make wine and when it was all said and done I had maybe 3 to 4 cups of watermelon pulp left over. Watermelons are something like 95% to 99% water. The hard part is extracting the water. I used everything in the kitchen with holes in it trying to find something the worked well. I found that a "new or at least clean" sock was best way to go.
Nathan Bowers
If you allow the yeast to fully ferment the mash where does the sweetness come from??
Marie Porter
There's more sugar than the yeast can ferment.
Robyn Witt
Just a tip from an old lady: Buy a package of knee high nylons. 6 pairs-12 disposable drip strainers!
Marie Porter
Love it!
David
Easy enough recipe to follow I’m on the second day of fermentation first time making wine so I wanted to check something . Yeast is very active looks to be a fifth or sixth way down the bottle just making sure that’s normal basically where the neck almost reaches full bottle diameter. Thanks!
Marie Porter
If the yeast is active, you're all good! It'll go where it goes, as it digests the available sugars
David
Follow up! Third day woke up to bubbled over airlock. I’m assuming very active 3-7 days? Also assuming this happens and I’m being an over protective parent but details below...
Anyway, I cleaned up, sanitized outer jar and the rim. Put in other sanitized airlocks. My question, any concerns about proceeding? I’d rather start over now then have something bad in 4-6 months. Temp 75f or less, smell off lock gives hint of wine or wine slushy I’ve had at weddings with hint of yeast. Thanks!
Marita
Really excited to try this! Do you think it would be OK to freeze the watermelon in chunks first or best to make it fresh? I like to do all my wine-making in the fall with frozen fruit once I've put the garden to bed...
Thanks!
Marie Porter
Frozen will be just fine, as long as you're careful to not let it get freezerburnt!
Brewman551
Hi Marie,
Our watermelon harvest was great this year, and we have about 10 good melons left after we've eaten what we could and blessed others with some. I want to make 2-3 gallons and can multiply your recipe accordingly. This is my first time with watermelon, but with other wines, I don't boil, but use Campden tablets instead. Would I just replace your boil step with those?
Marie Porter
We've always boiled instead of using Campden tablets, so I'd say if you're going that way, just follow whatever directions the Campden tablets come with.
Tim
How is the clarity on your final product? And what were your fermentation temperatures? I think light carbonation would add a nice dimension to something like this. What do you think?
Marie Porter
The wine ferments out very clear. We've never measured temperature, we just brew everything in our basement (across 3 different houses over the years).
Carbonation could be fun with this, for sure!
David
Is it normal to be boozy tasting after primary? I assume it needs time to mellow during secondary? First time wine maker
Marie Porter
Definitely normal!
Most wine needs to are a bit before it's really potable.
Danielle
I'm hearing/reading that the carboys should be topped off after racking with a store bought wine or cooled/boiled water. Not to leave air space at the top, from the sediment left behind. Advice, please? Will be racking the first time tomorrow.
Marie Porter
Honestly, we don't really worry about it. Carbon dioxide (the gas coming from the yeast) is heavier than air, creating a kind of constantly-outgassing "cushion" over the wine.
We've never topped up, and have even had bottles only half filled - no problems.
Of course, you can top up if you'd like, we just prefer to keep the flavour and density of the wine as-is.
It's all good!
Teddi
I am making 6 gallons. After breaking down the watermelon and adding sugar and bringing to room temp, it is thick and a specific gravity of 1.150. I went ahead with primary fermentation and when I racked after a month smells amazing, but still quite thick. Any suggestions, or do I just keep on keepin' on with it?
Teddi
I did end up adding 3/4 of a gallon of water to reduce airspace in carboy. that seems to thin it a bit.
Marie Porter
Depends on what you like in a wine! You can thin it out with (sterile!) water if you'd like, or leave it as-is for more of a dessert wine.
MELINDA
You say to set it in a cool but not cold area.. about temp are we talking about?
Marie Porter
Like a a basement temp, rather than a "garage in winter" temp.
MELINDA
I have extra fine sugar, can I use that do you think ?
Marie Porter
Sure, as long as it's not *powdered* sugar!
Ian
I make a lot of Fruit Wine with an alohol content of around 6 to 8%. I am not allowed to call them Cider, and if I do, I always get screamed down.
I ferment at a controlled 22 deg C with a starting SG of 1.1
I have found that bread yeast (Lowan Yeast Dried Instant) will go to around 10% and ferment quickly. Champagne yeast (I use EC-1118) will give a cleaner flavour but ferments more slowly. I tend to clarify and rack off after only a fortnight, and then cut back with 50% juice and some sugar if needed. It is then left to mature for a few months in a refridgerator, if I can wait that long.
I normally clarify with gelatin. With watermelon, I found that the watermelon taste doesn't really shine through, but I can add taste and color by clarifying with watermelon flavoured jelly crystals. The gelatin clarifies the wine and drops out, leaving the flavour and colour. Totally fake, I know but it works, and you end up with a refreshing drink which looks and tastes ike watermelon.
Hunter
What is the watermelon wine supposed to smell like after racking the first time?
Marie Porter
Basically just like.. yeast and alcohol.
Aman Sharma
This is a great recipe! I'm going to have to try it!
kent ng
Hello, a bit late to the party but i made this watermelon wine after a few successful attempts at mead. It came out a light straw color with the red bits settled on the bottom and stuck to the side of my glass carboy. I left it in the carboy, without racking, for about a year as I just had twins. I just bottled it and it smells very skunky and stinky. I'm wondering if this is bad?
Marie Porter
That can be "skunked wine" - sulfur compounds formed due to exposure to air and/or light. Did your airlock dry out over that year?
I haven't had it happen, but I've heard that dropping a really old (all copper) penny into it can neutralize the sulfur.
Personally, I'd chuck it and start over - it could also smell bad from bacterial contamination, and I'm not one to take the risk on consuming spoiled wine.
Darren
Well this year I had a bumper crop of Black Watermelon! About 45 melons from 6 plants, 4 of which weighed in at over 22 pounds! I’ve given away and eaten so much I think I’m turning into a watermelon. Haha! So I goggled watermelon wine and yours was the first one up. A long story short, as I was processing as per your recipe I found I was having an issue with straining off the juice. I used a wire colander and quickly became plugged with the pulp. I added a jelly bag to help, but still took about 3 hours to strain the juice ( given how filling these melons are to eat I’m guessing the flesh is more fibrous then other kinds) so to my question. Would a steam juicer be more effective in extracting the juices? Pros and cons of using a steam juicer? It seems to be about 50/50 for making fruit wines. Just a little background info, so far I’ve only made kit wines and of course virtually foolproof. Last year I tried apricot but failed miserably, mostly my fault in scaling up the recipe. Your methods seem much simpler! My next batch will be bing cherry, and maybe raspberry, of which I have a freezer full of! So I’m hoping that the steam juicer will be my best friend! Next year perhaps more watermelon and maybe strawberry and I really want to try mulberry as well!
Marie Porter
I'm not sure why you're straining the juice? You boil the watermelon to break it down a bit, but the only time anything is getting strained in any way, is when it gets racked off the pulp after fermenting for a bit.
Maga Barton
HI, I may have missed this, lol, been reading and listening to a lot. A question, can I use a 5 gallon food quality bucket to make this wine, double batch?
Thanks so much for all the time invested in this blog, I love it!
Maga
ps rated 5 because you've done a great job, but have not tried this yet..
Marie Porter
You can for the first fermentation, for sure!
When you are supposed to rack it into carboys, though, you're going to want to use the smaller ones and keep them fairly full - more head space means more chance for it to spoil.
And thank you for your kind words!